Image 1 — ComfyUI-ContextAnchoredTileRefine - New 8k+ latent upscaling method using Krea 2
Image 2 — ComfyUI-ContextAnchoredTileRefine - New 8k+ latent upscaling method using Krea 2
Image 3 — ComfyUI-ContextAnchoredTileRefine - New 8k+ latent upscaling method using Krea 2
Image 4 — ComfyUI-ContextAnchoredTileRefine - New 8k+ latent upscaling method using Krea 2
Image 5 — ComfyUI-ContextAnchoredTileRefine - New 8k+ latent upscaling method using Krea 2
Image 6 — ComfyUI-ContextAnchoredTileRefine - New 8k+ latent upscaling method using Krea 2
▲ 56 r/krea+2 crossposts

ComfyUI-ContextAnchoredTileRefine - New 8k+ latent upscaling method using Krea 2

Use these links to view the full size images

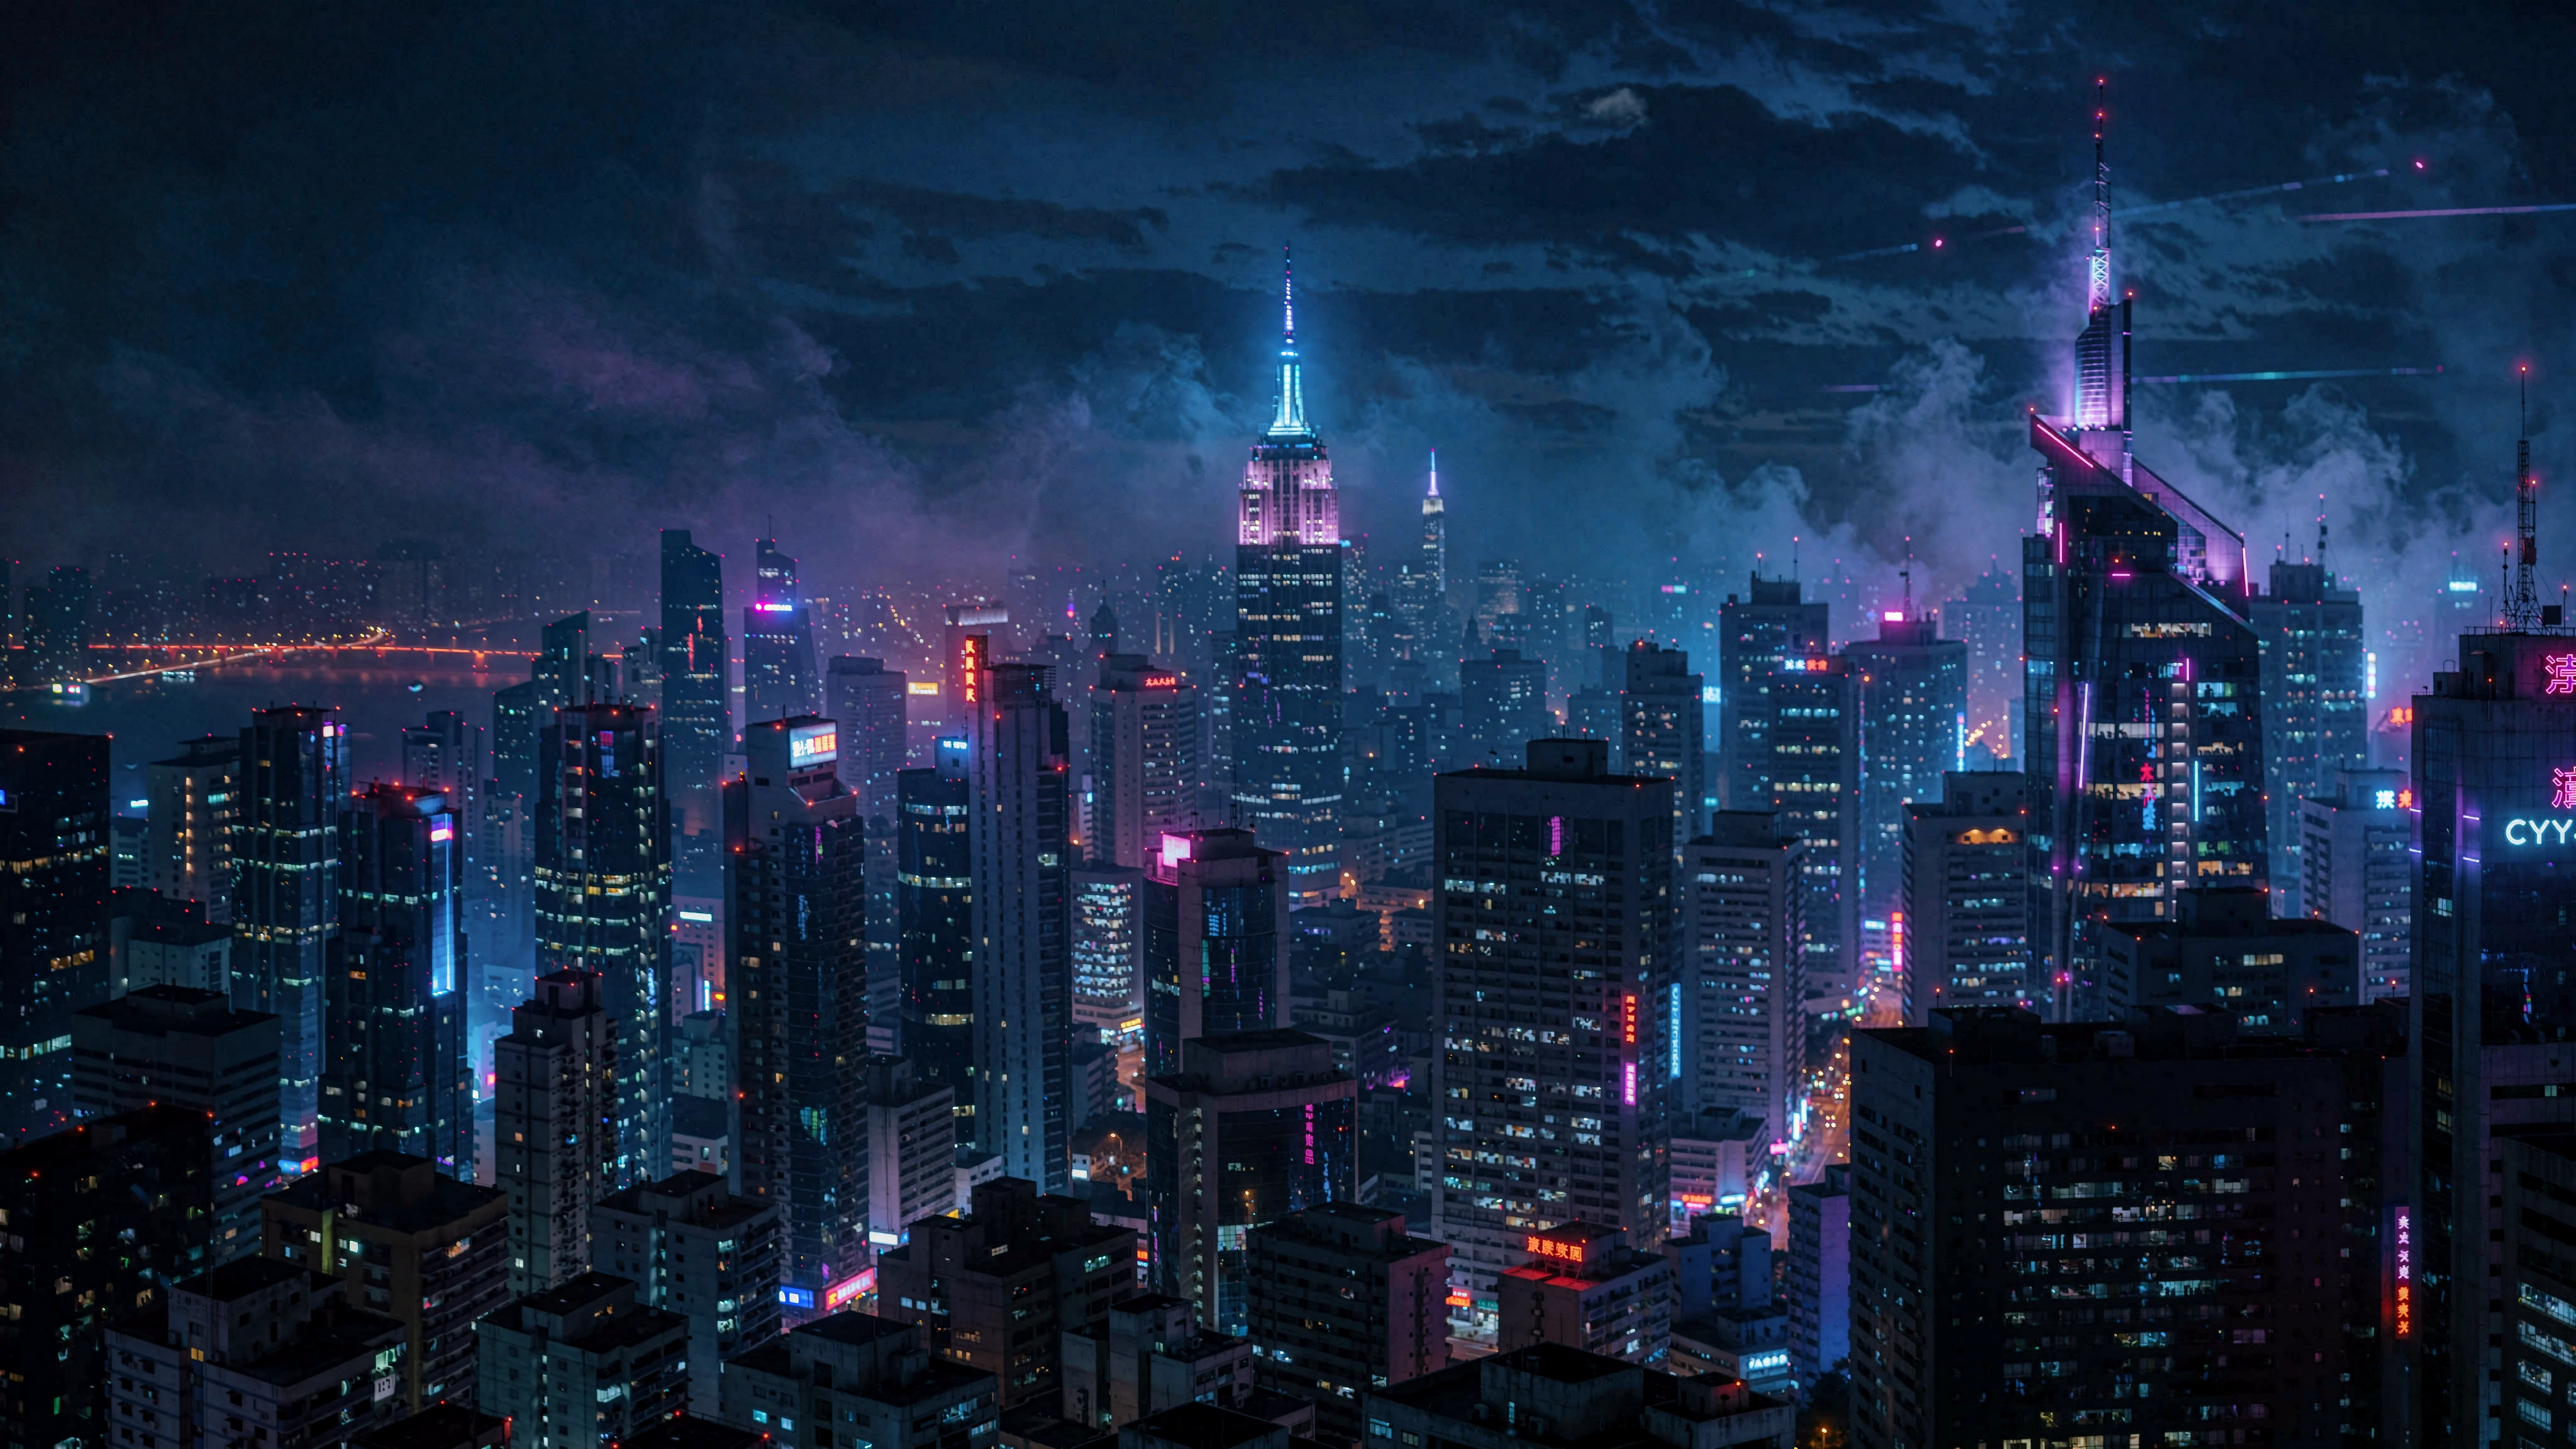
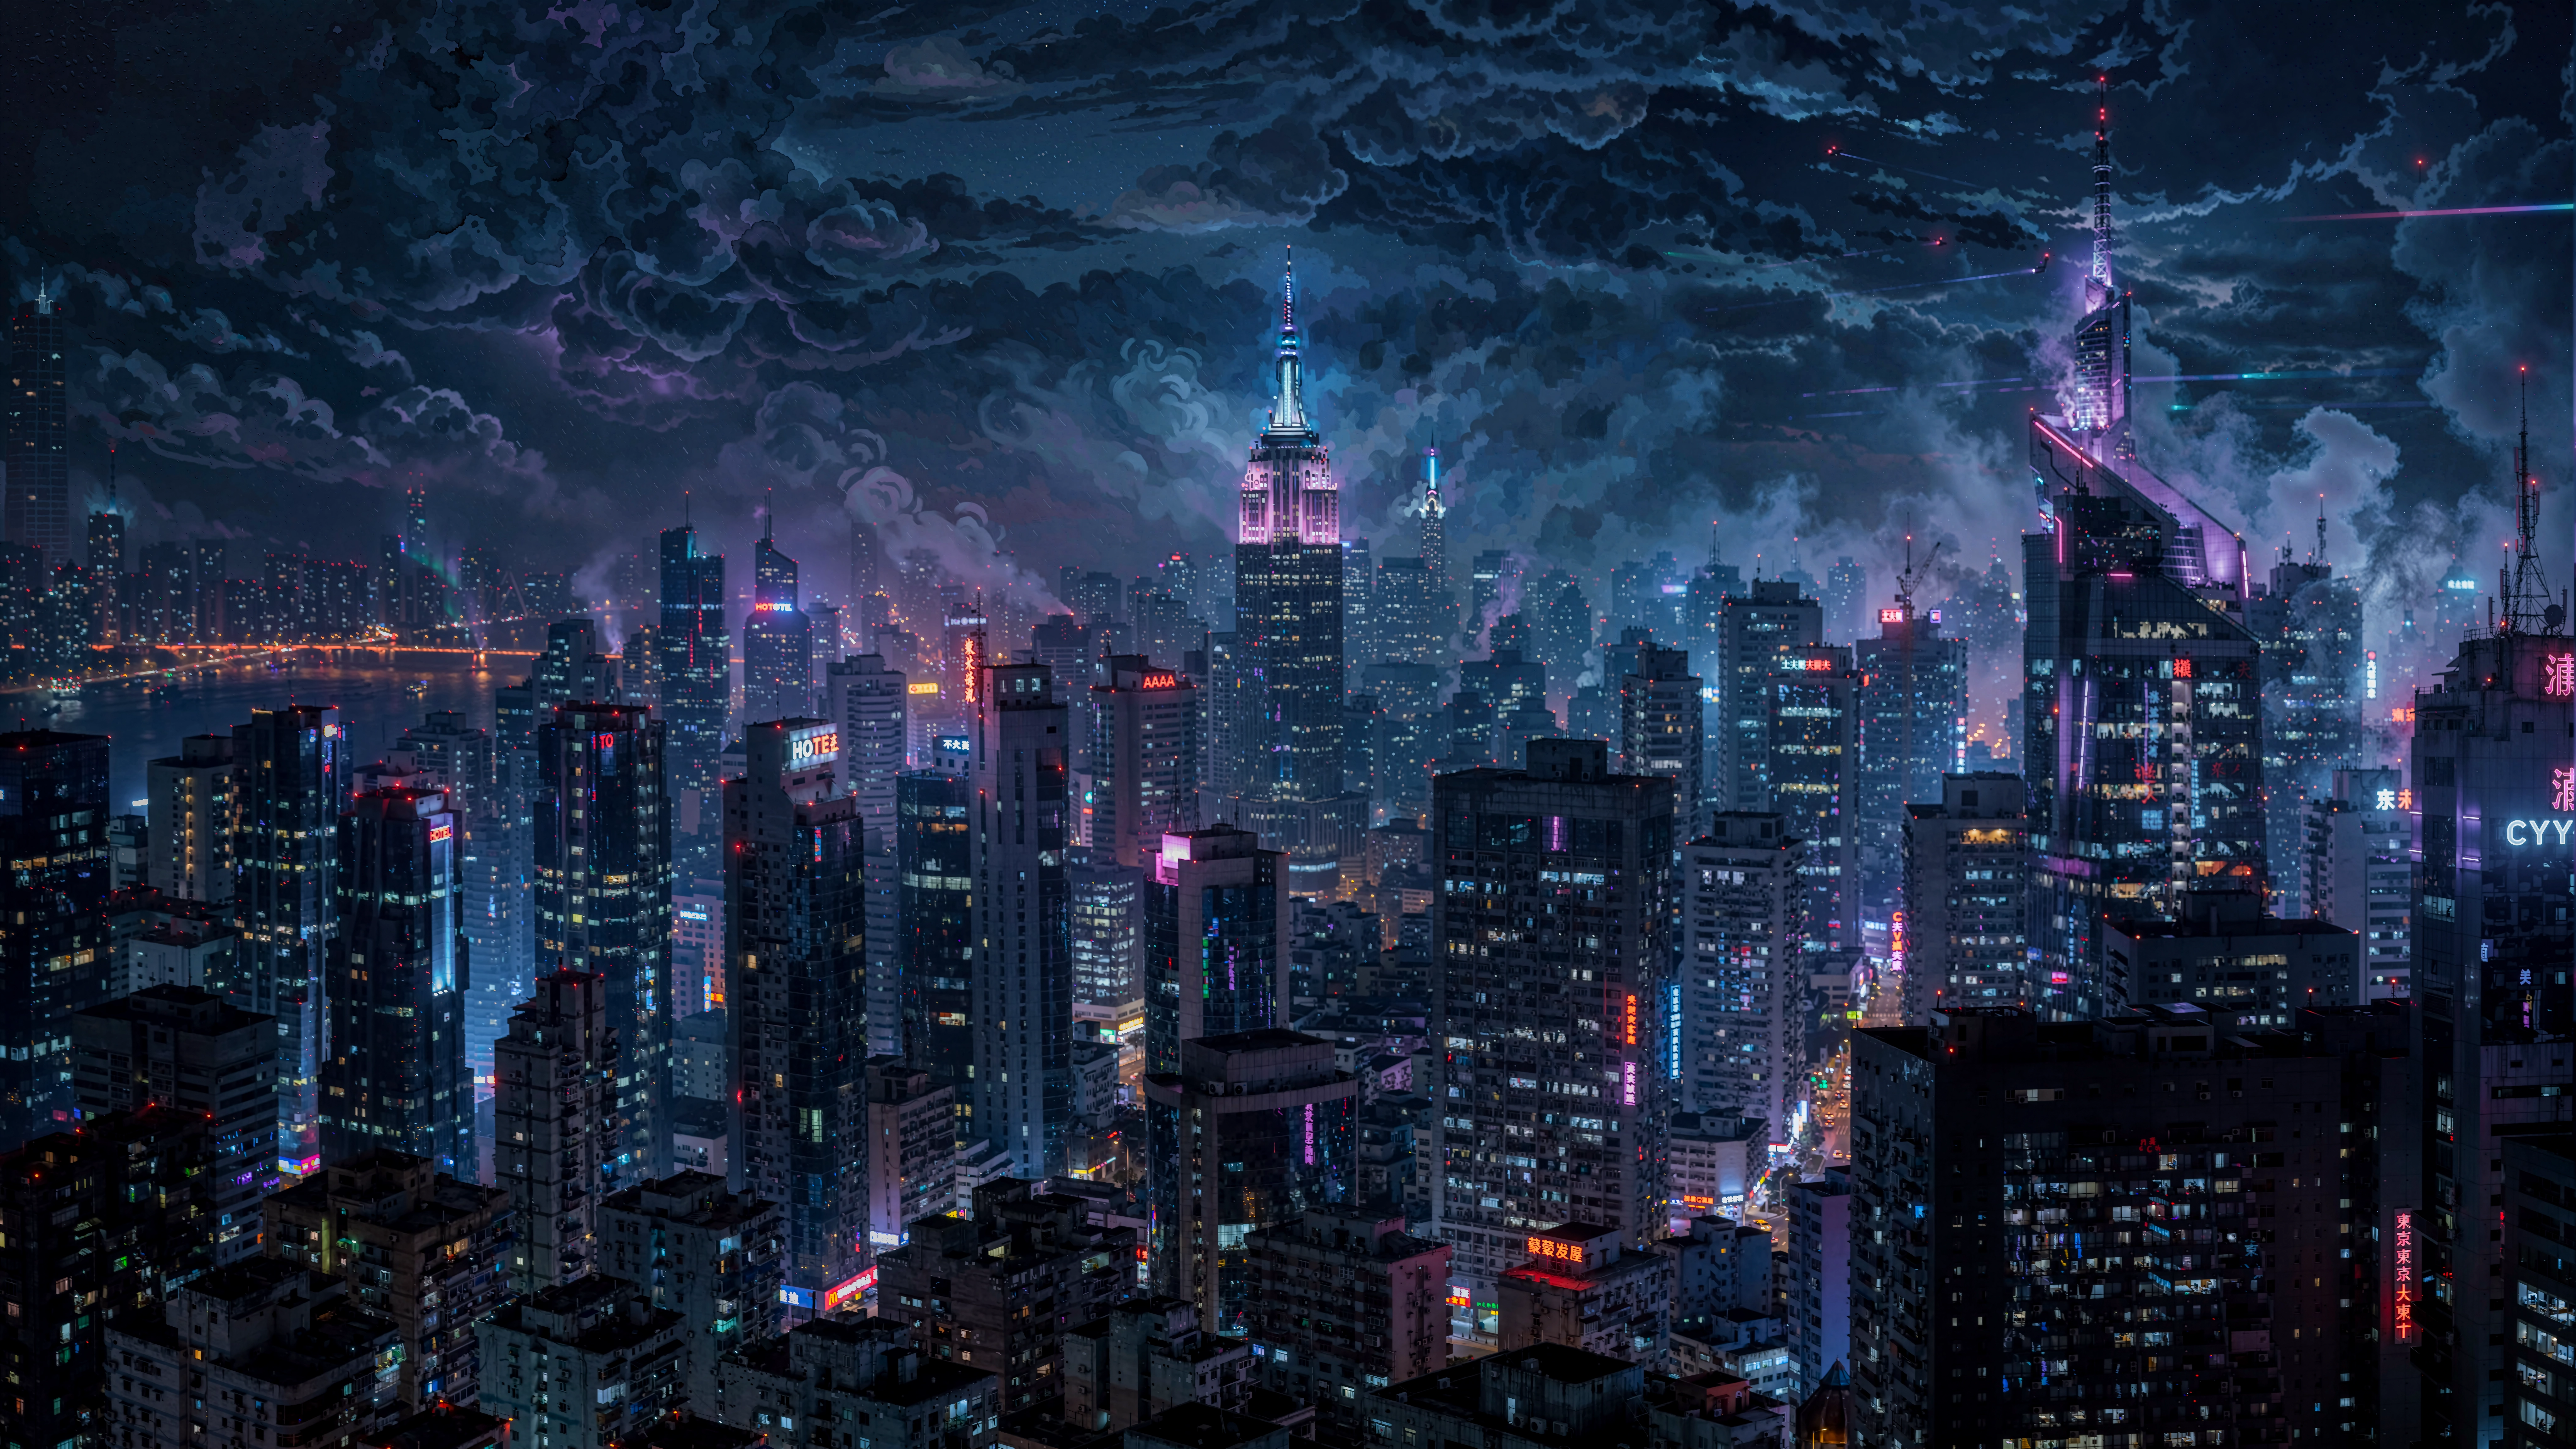
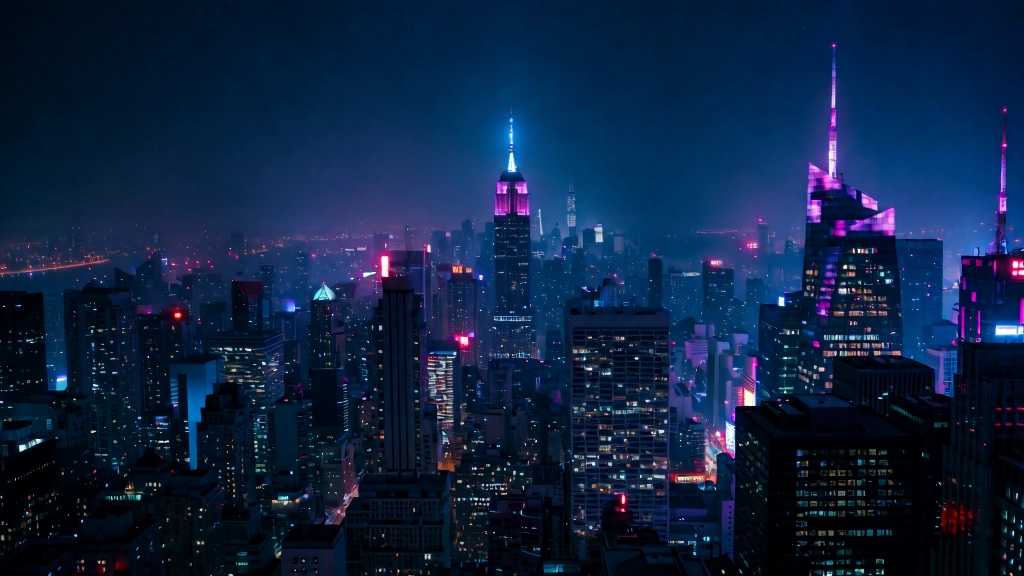
Cyberpunk Cityscape Original
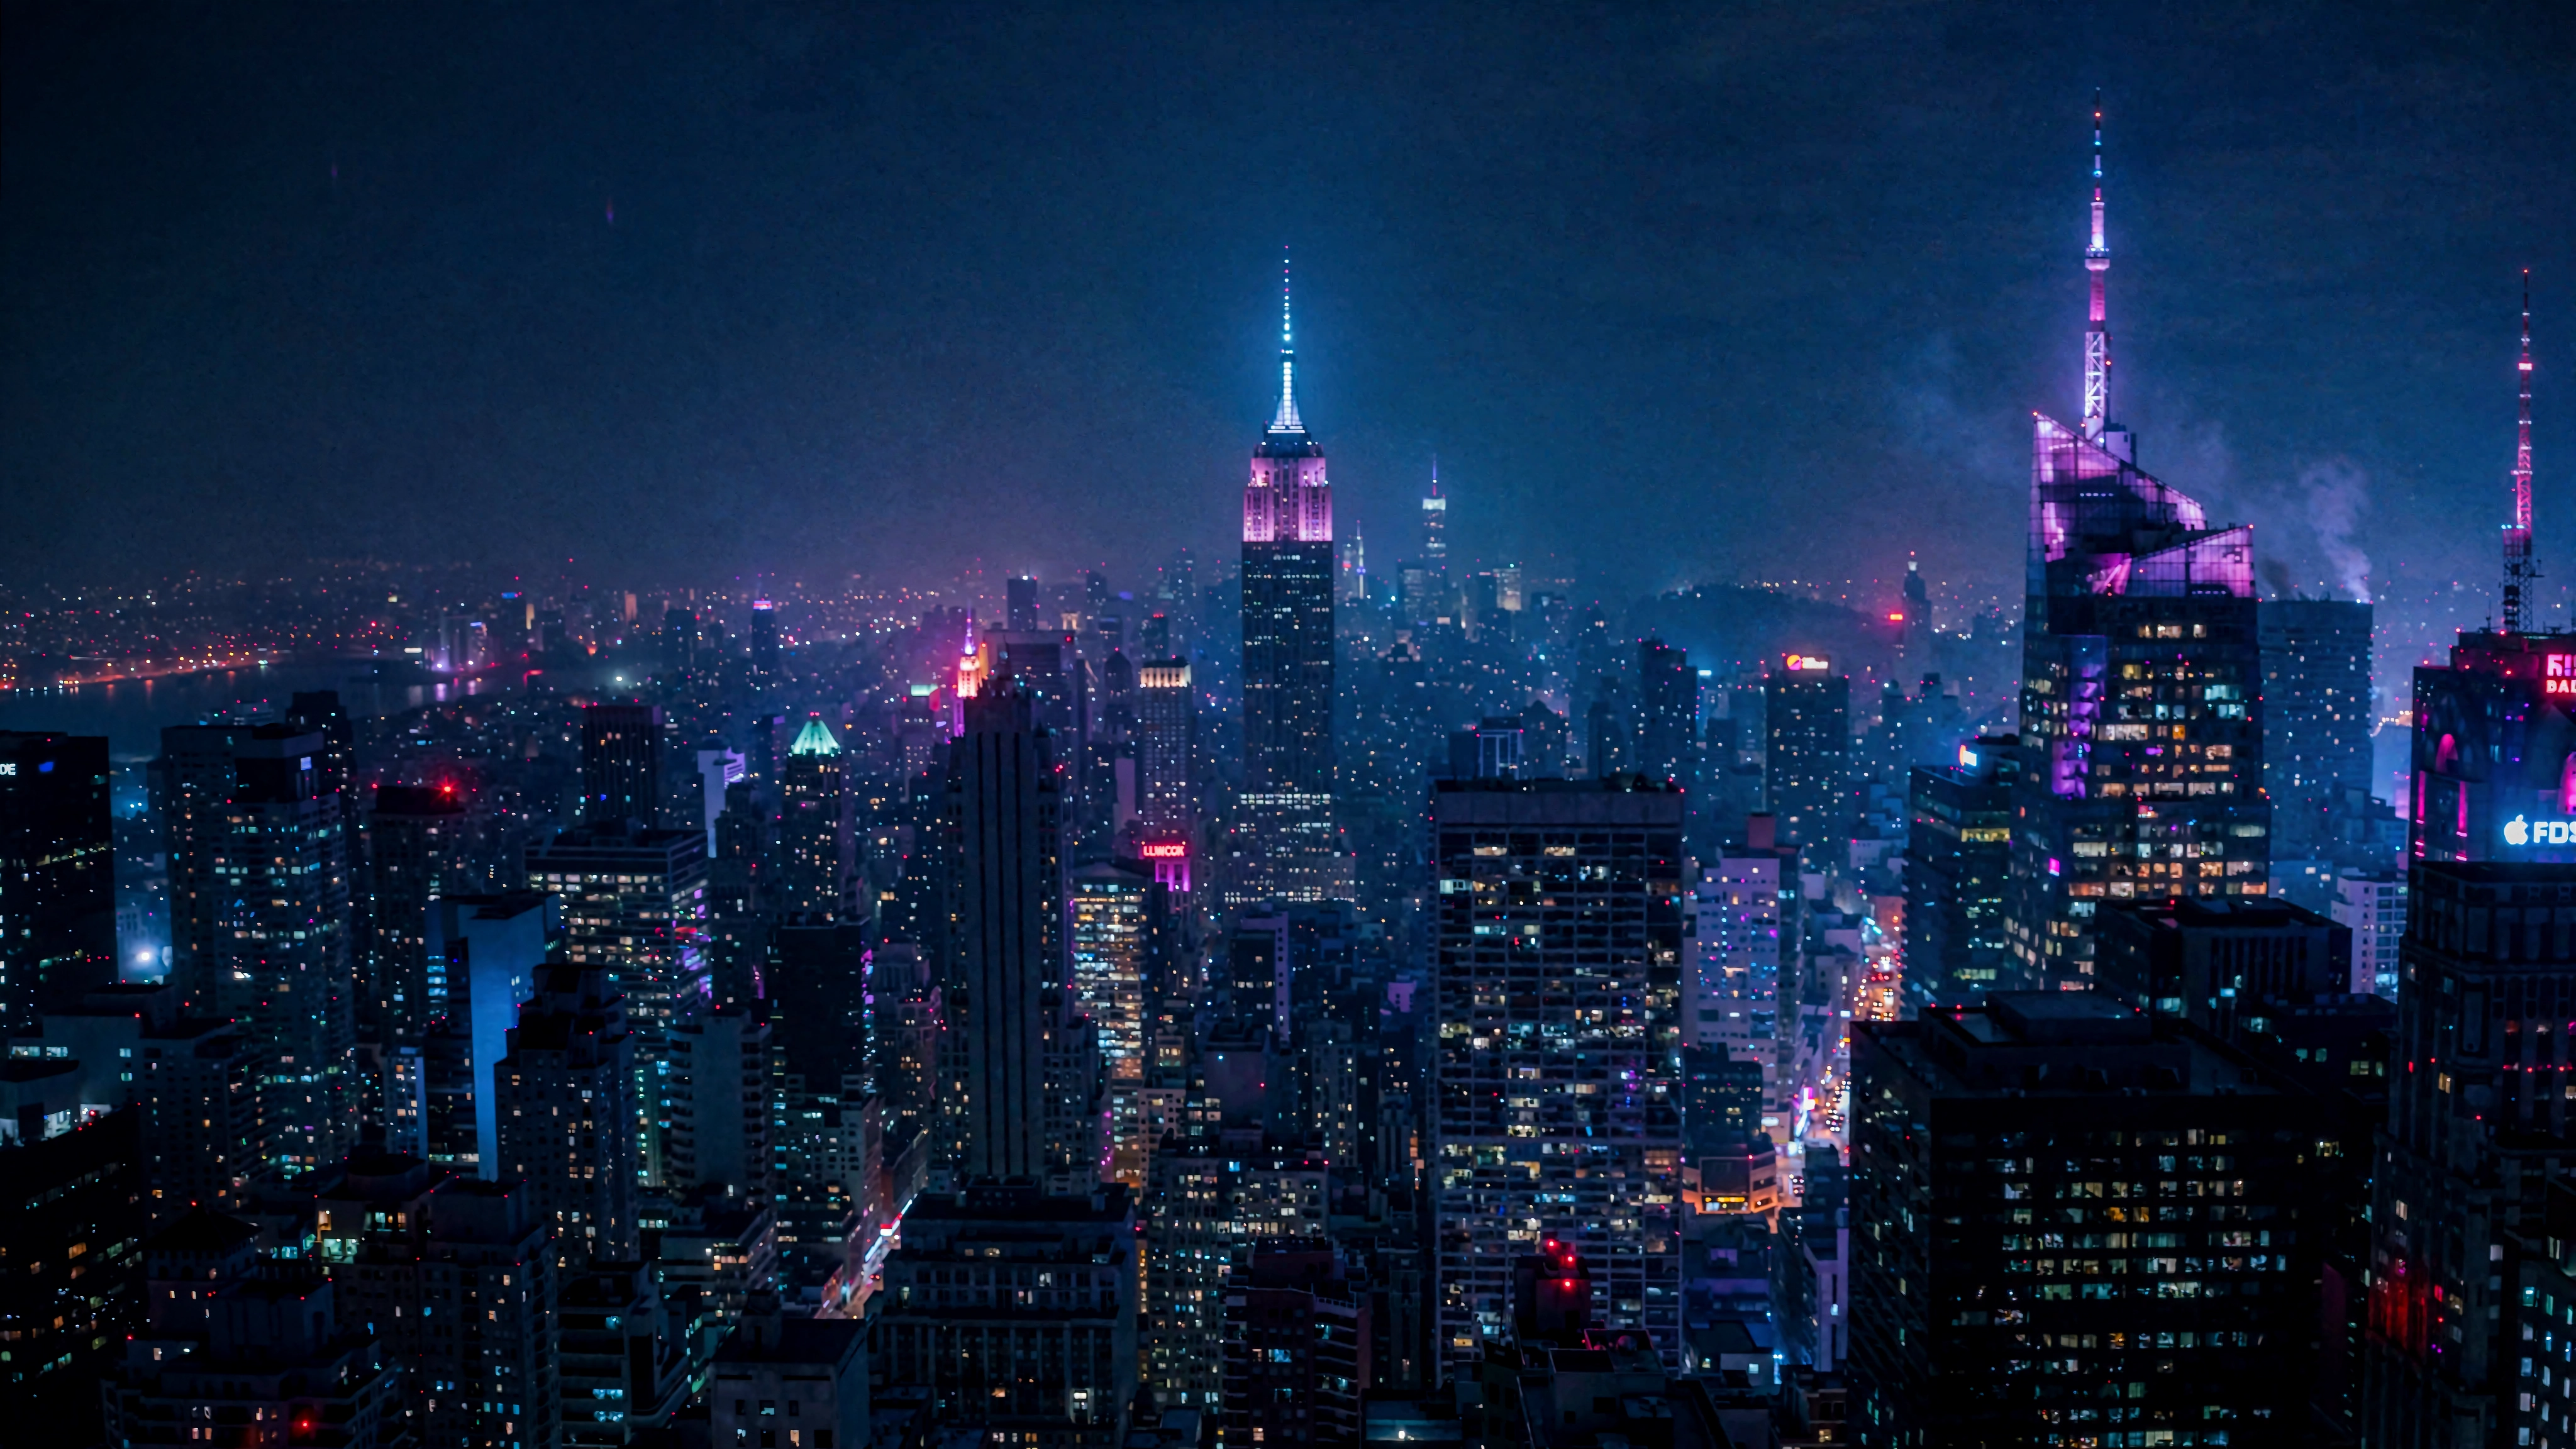
Cyberpunk Cityscape 4k
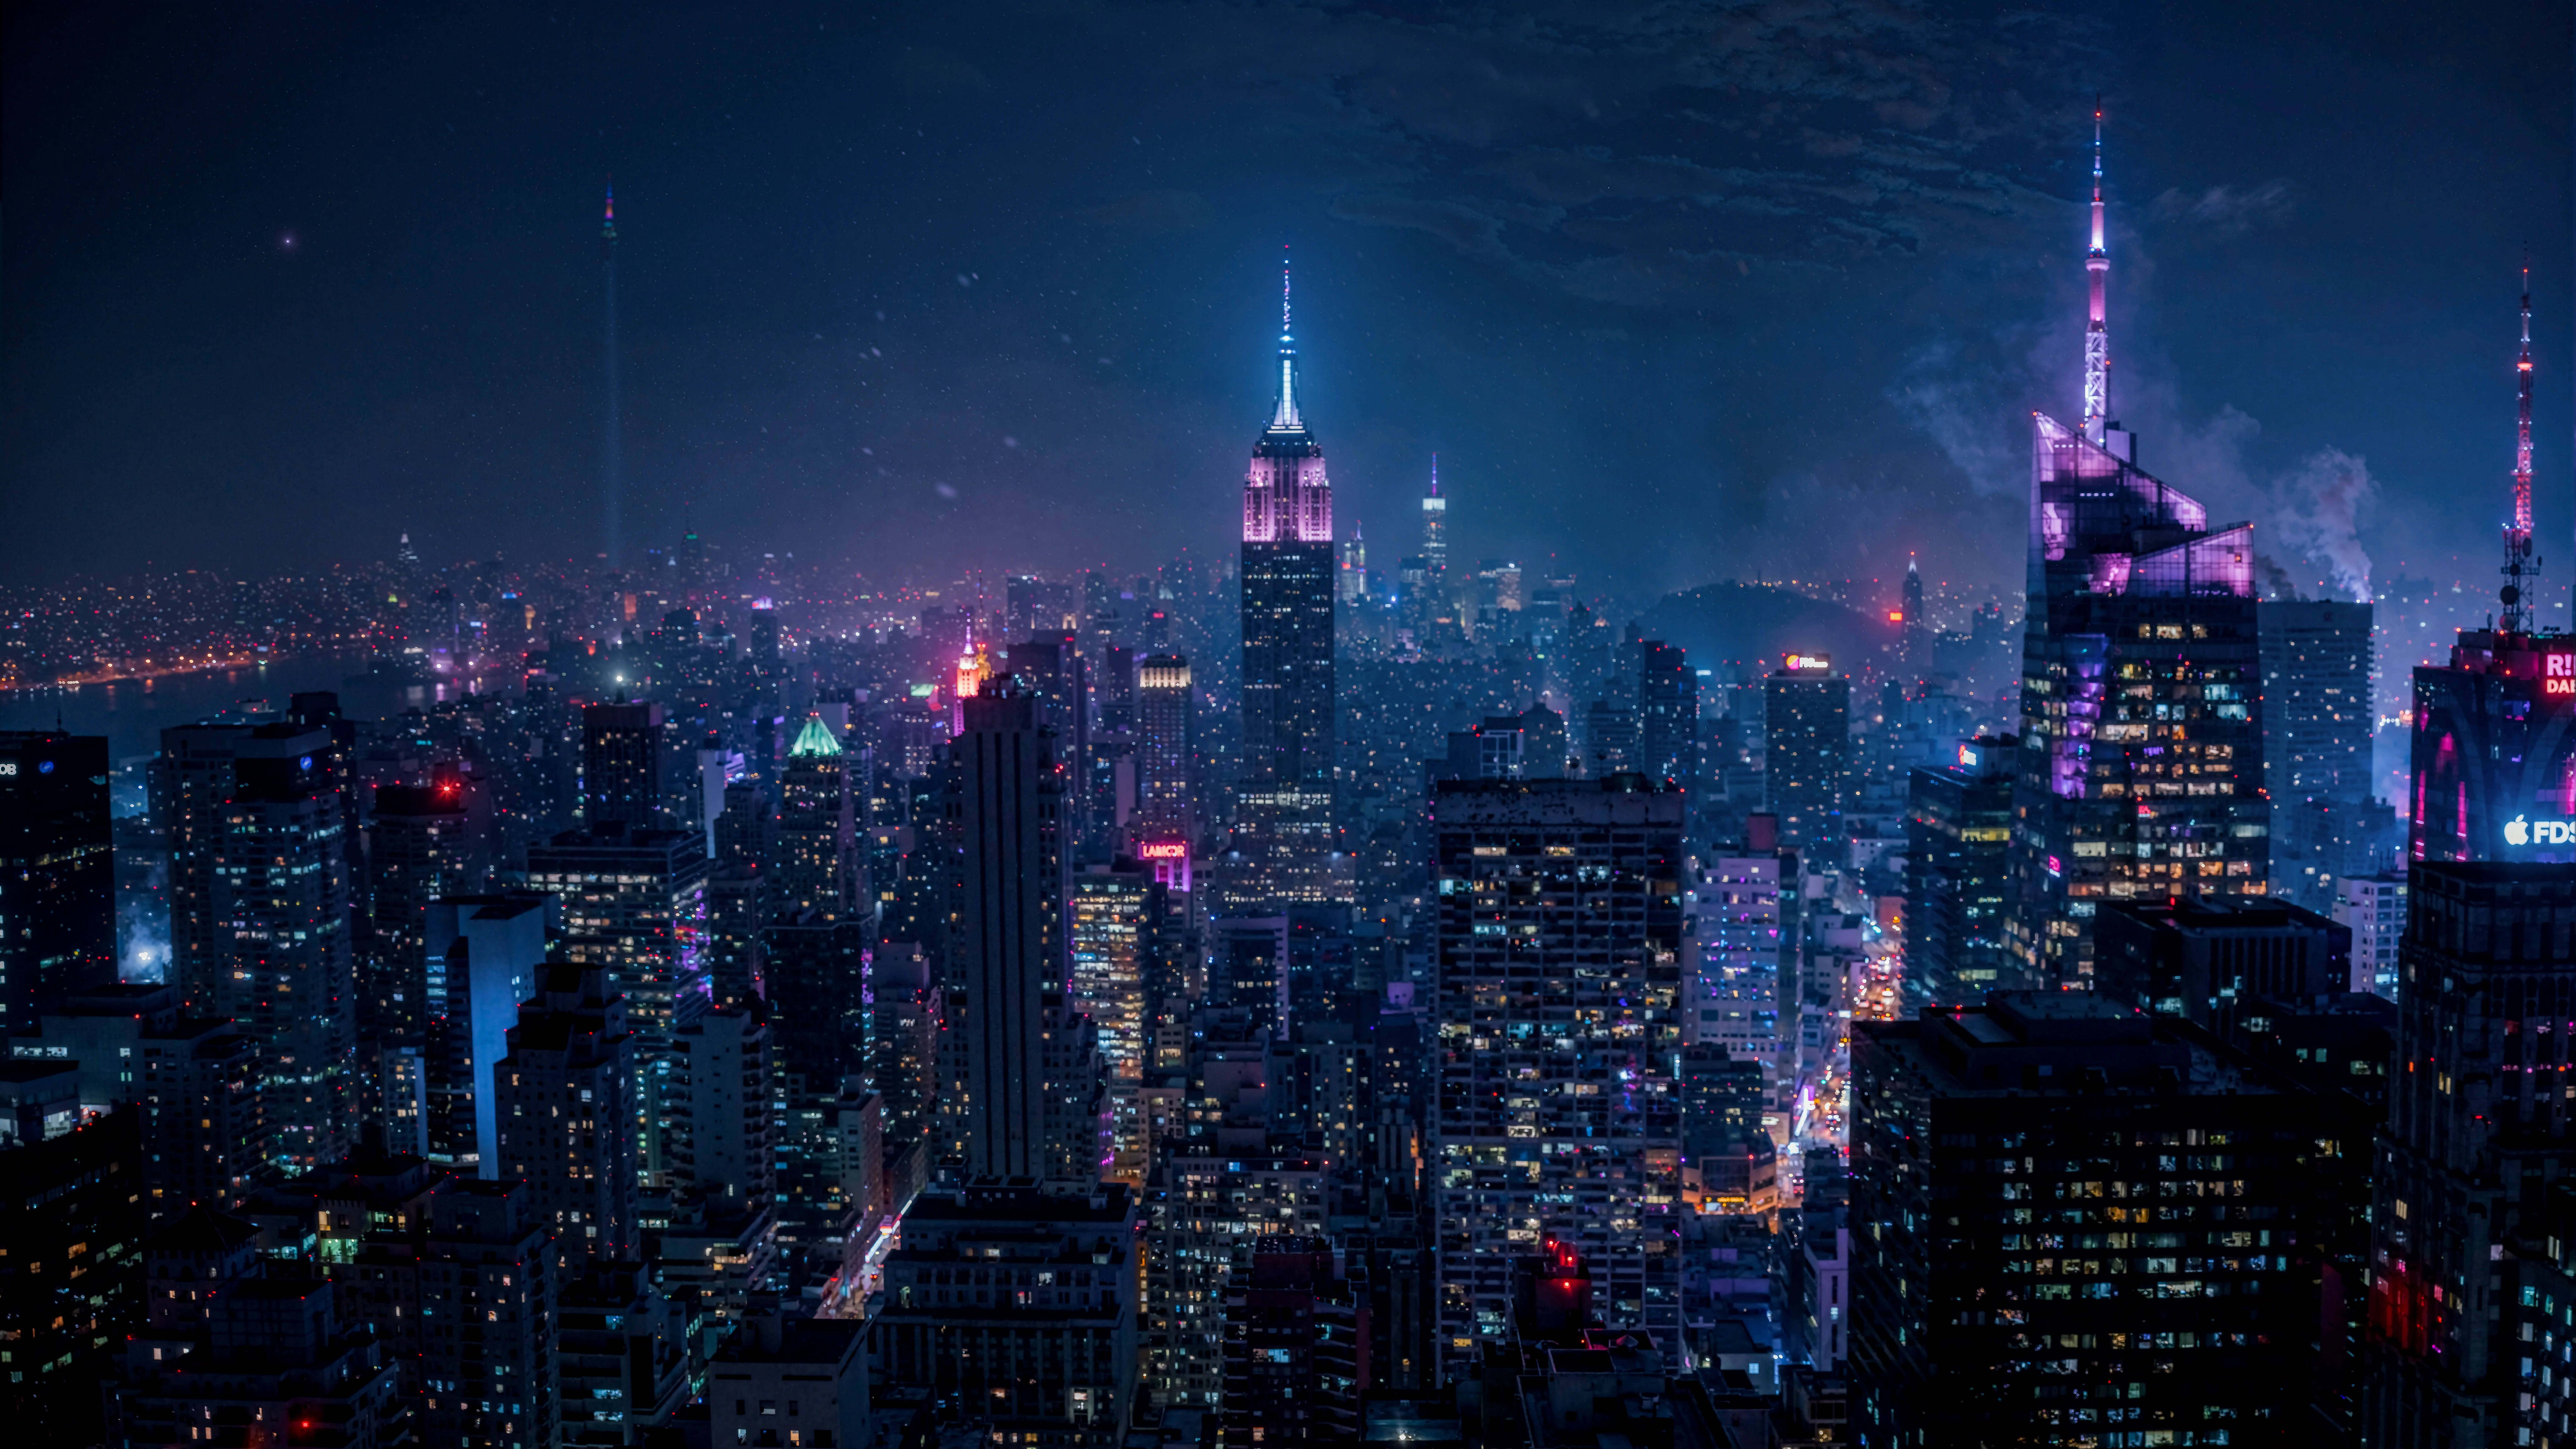
Cyberpunk Cityscape 8k
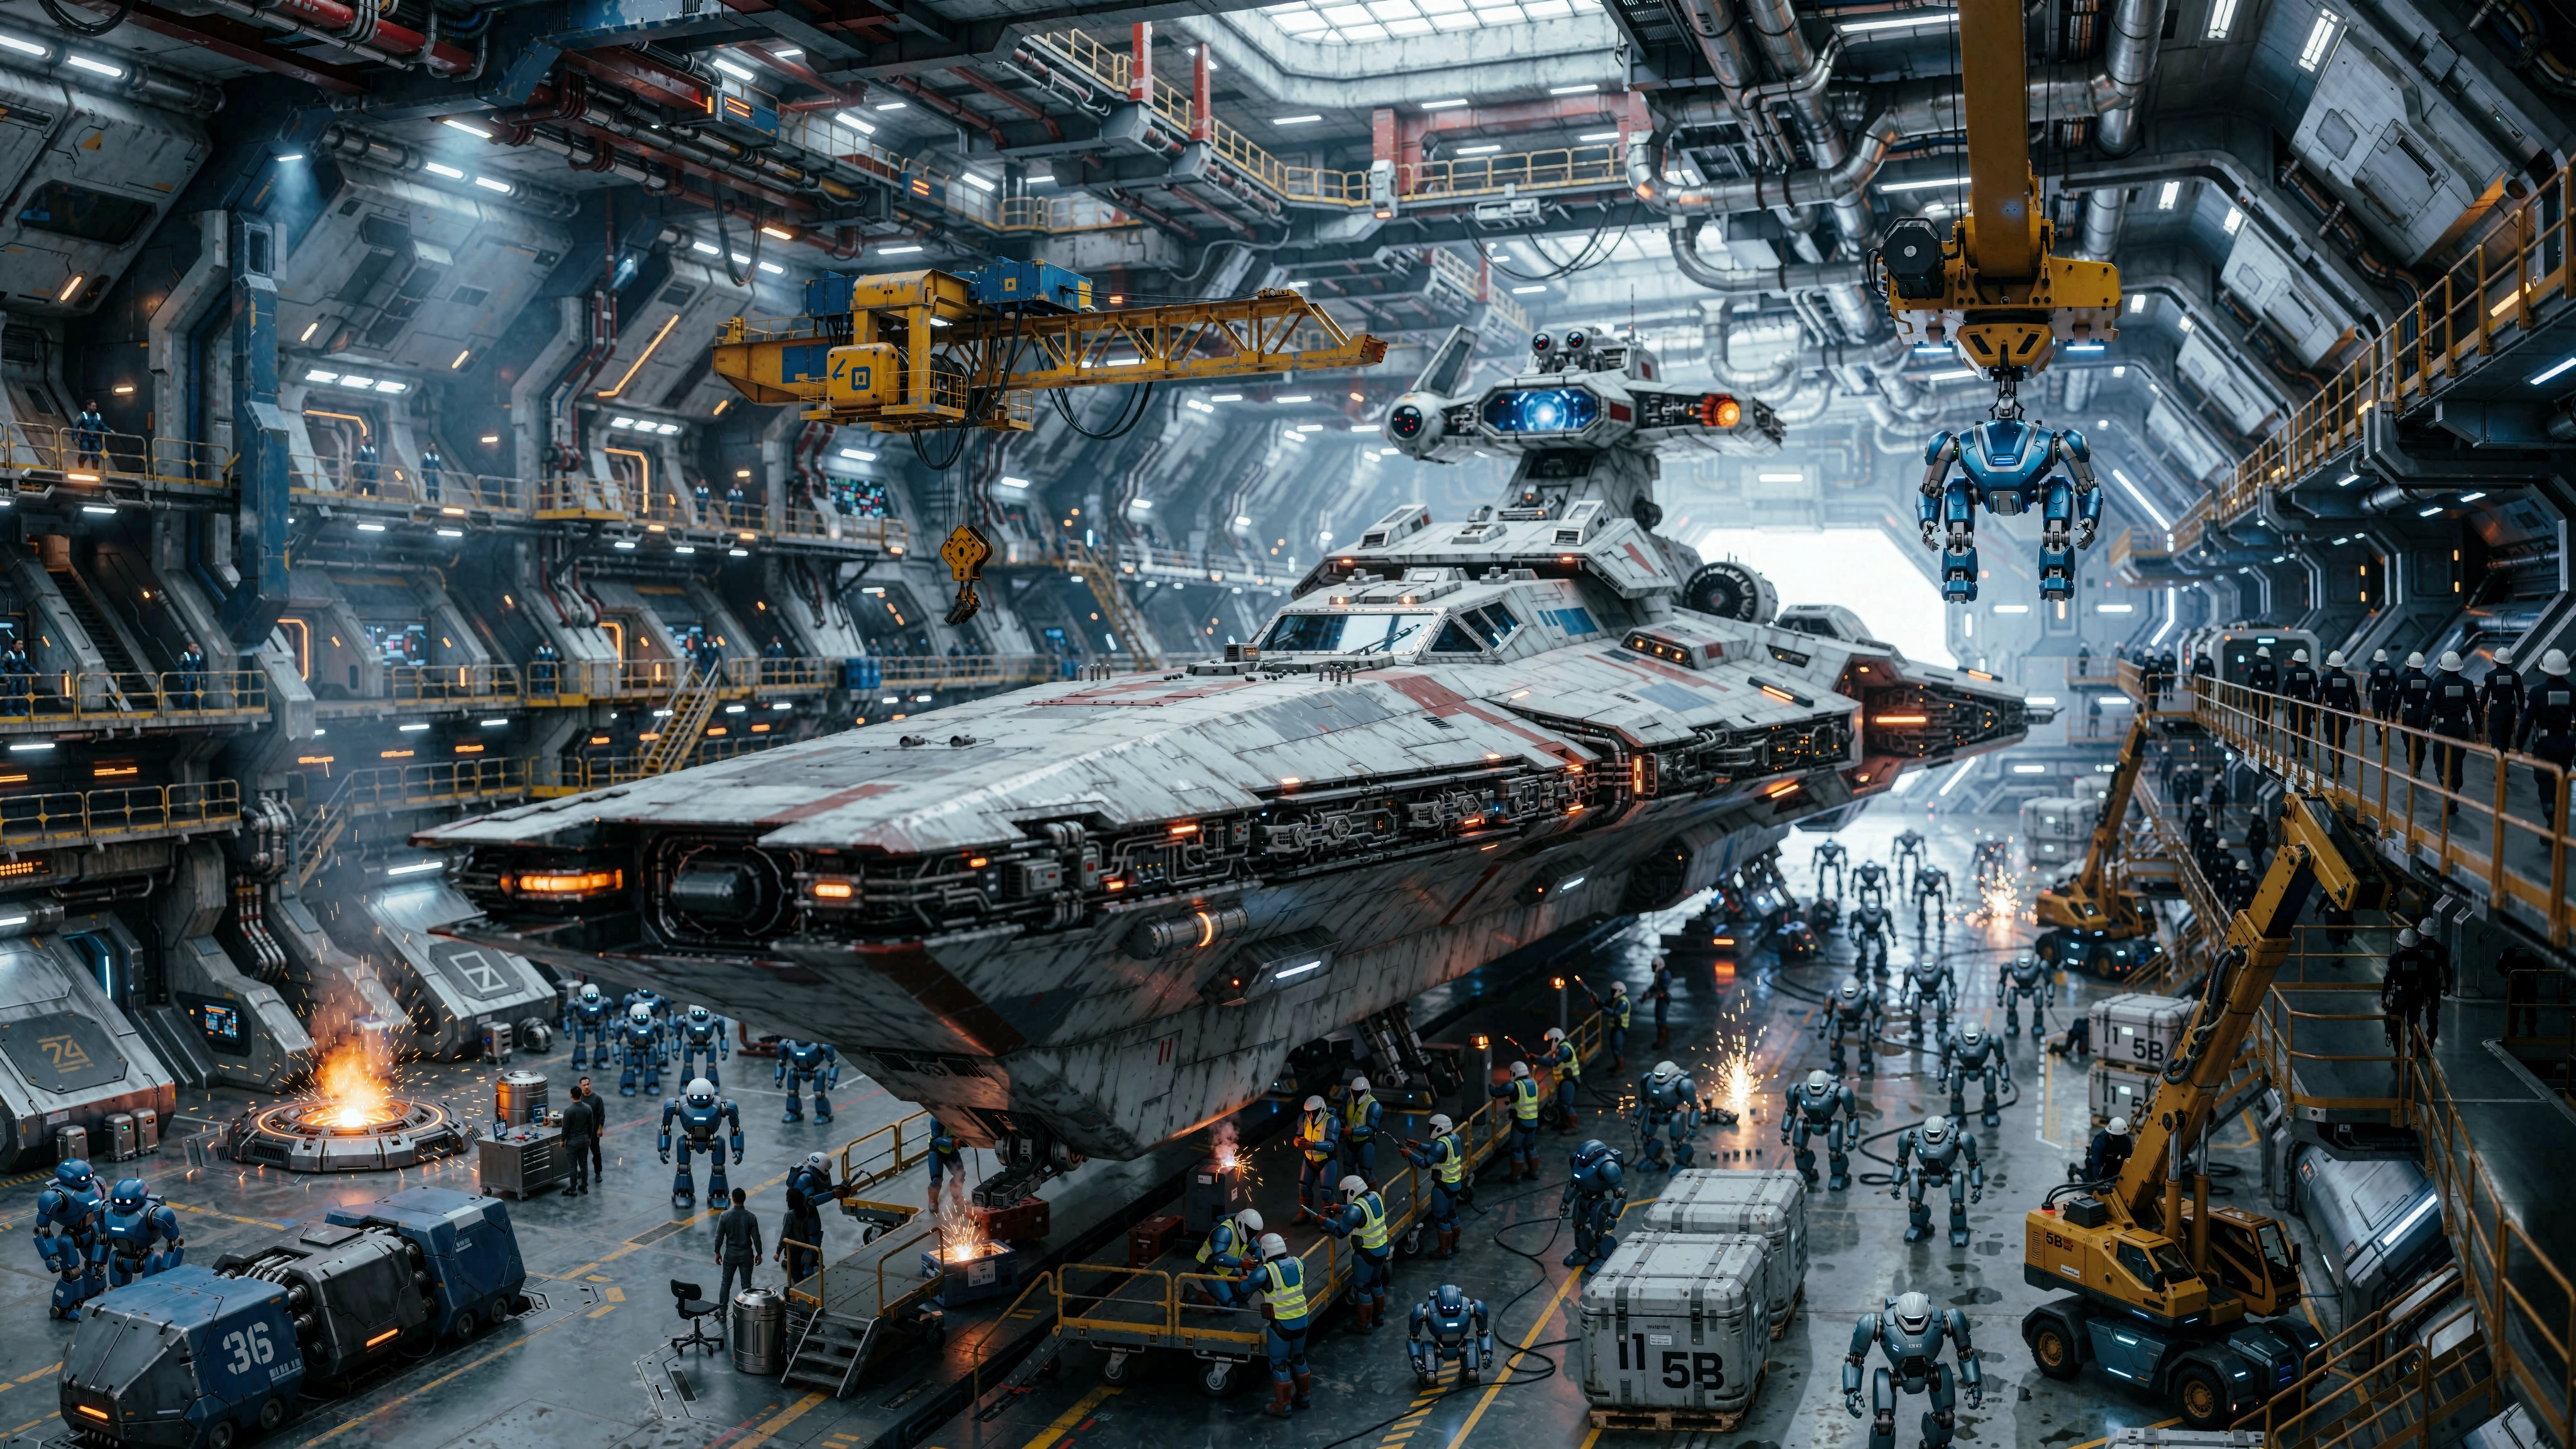
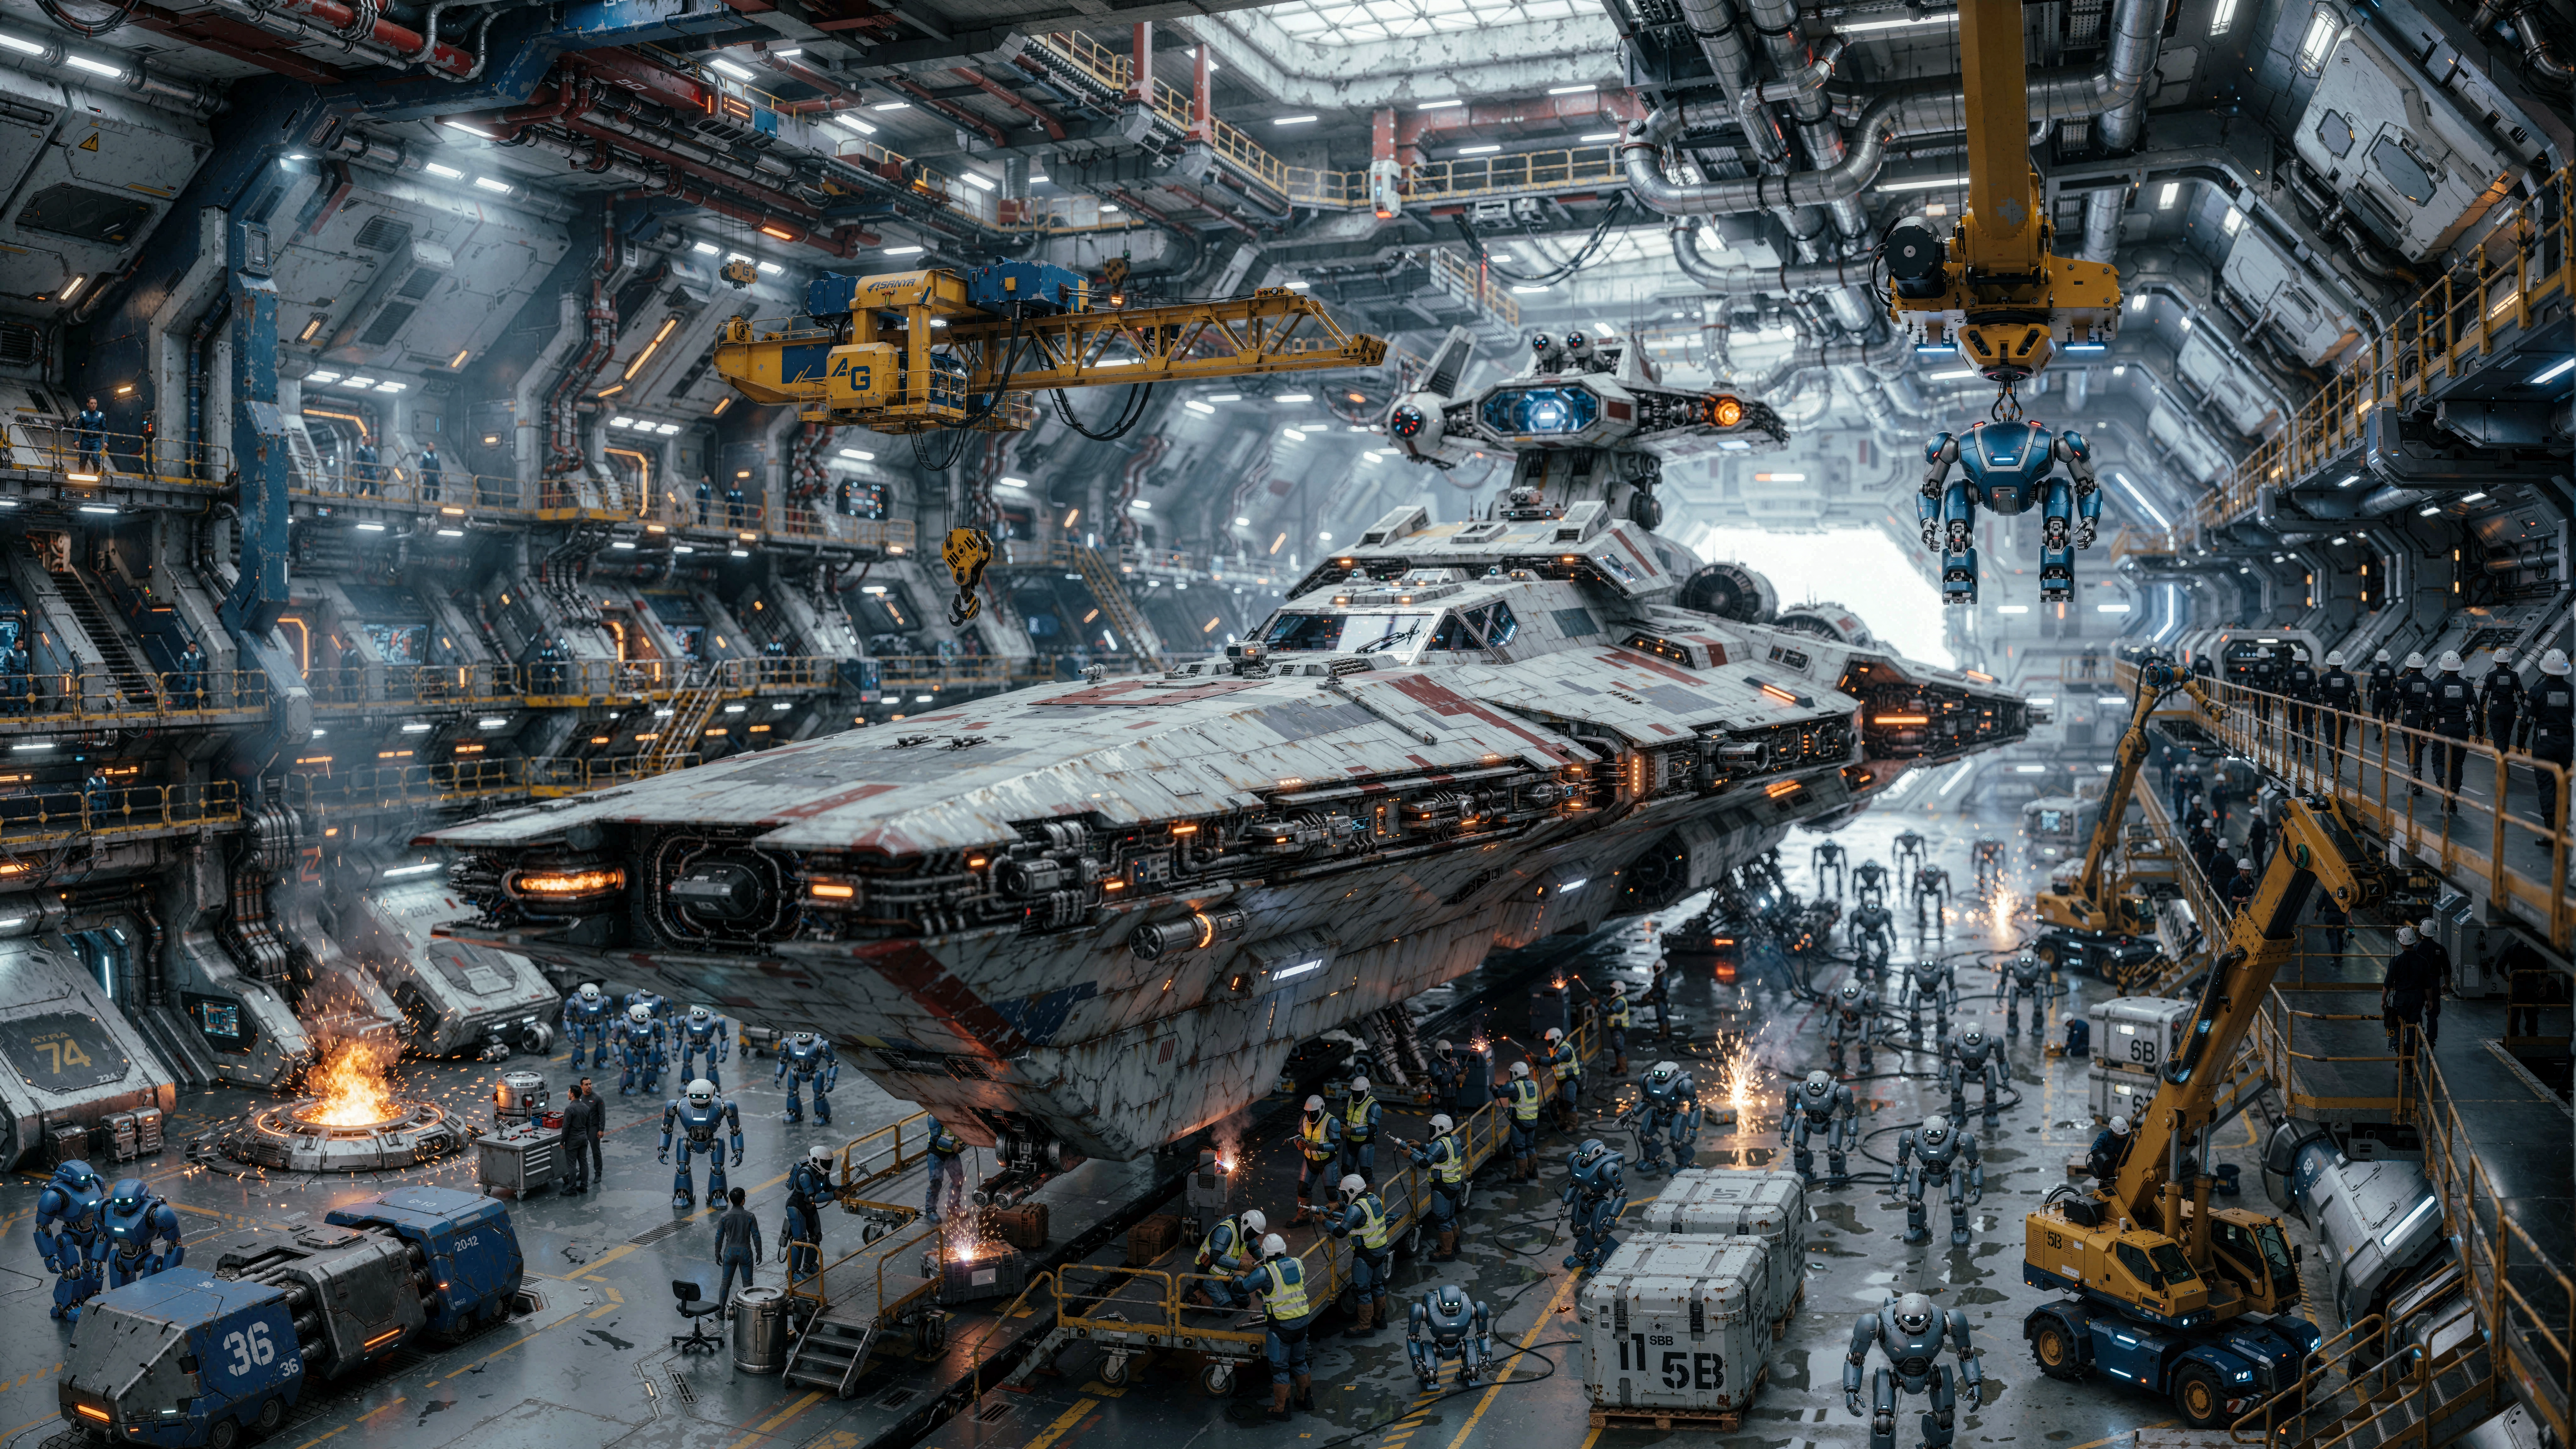
Orbital Shipyard Hangar Original
Orbital Shipyard Hangar 4k
Orbital Shipyard Hangar 8k

https://github.com/Blakeem/ComfyUI-ContextAnchoredTileRefine

These were upscaled using high denoise (0.5), captions, live canvas anchoring, and a stochastic (sde) sampler. If you have used other tile upscalers you will know that coherent creative upscaling is the hardest thing to do, since it requires maintaining coherence over a massive canvas. These images have 37,748,736 pixels being generated by a model that is only processing 2,013,696 pixels at any one time.

If you want to preserve the original image. Use low denoise (0.35), vision tokens, anchor to the source image, and use a deterministic sampler. Here is what that looks like:

Cyberpunk Cityscape Original
Cyberpunk Cityscape Conservative 4k
Cyberpunk Cityscape Conservative 8k
Compared to the Tiled Diffusion node (ComfyUI-TiledDiffusion):

>Theirs is a model patch below the sampler.
Mine wraps above the sampler and guider.

>Theirs has one sampler.
With mine each tile has it's own full sampler.

>Mine uses region of interest (RoI) token slicing in a tile upscaler (see my previous post on this subject).

>Both refine an upscaled image inside one latent canvas one step at a time so tiles don't drift apart.

>Theirs uses an average (uniform MultiDiffusion and Gaussian Mixture of Diffusers) that causes the image to be soft.
Mine does a directional blend in raster order, the later tiles blend into the earlier ones whose context they reach out to, so it maintains the models sharp raw output.

>Mine also supports masks, something the other method does not. Mine doesn't support ControlNet (at least not the VL node, the standard node does). But Krea 2 has no good ControlNet model because it isn't built for it and requires a LoRA.

I've been testing out different methods to upscale and hide seams in Krea 2 and I had a massive breakthrough last night during A/B testing. Everything happens in the latent canvas, so there is no color drift across tiles because everything happens with a single decode.

The 8k images were done in two stages, first to 4k with 6 tiles and then to 8k with 30 tiles on my 3090ti. You could go to 8k in a single pass and probably up to 16k. Creating a larger image does not increase memory by much, it just takes more time.

These are my first two test images I made, so don't judge based on that. The quality is staggering compared to what I've been able to do before. In the Cyberpunk Cityscape you can make out a McDonald's on the street as well as people, desks, and computers inside the office windows. The cables and wires in the Orbital Shipyard Hangar do not cut off across tiles. These are things that I only dreamed of with previous methods and there is still room to improve.

Please view the full size images on github so you can zoom in, reddit doesn't do them justice. This is where you will find the technical details for how I'm doing this as well as finding the workflow that I used to make the images.

u/blakeem — 3 days ago
▲ 21 r/krea+3 crossposts

Prompt-free tiled upscaling with Krea 2 (new method, I think?): each tile conditioned on sliced vision tokens from one whole-image encode. 4x upscale to 4K+ at 0.5 denoise

Krea 2 was terrible with my tile refine node. It needed very low denoise, didn't add the quality I hoped for, and I kept getting artifacts near tile edges and objects from the prompt duplicated across tiles. The only "ControlNet" for it (a depth LoRA) didn't work with tiles at all. After about 50 rounds of trial and error and A/B testing, this is what finally worked.

The problem is that the prompt describes the whole image, but each tile only holds part of it, so a strongly prompt-adherent model tries to re-create the whole prompt inside every tile. Custom prompts per tile didn't fix it either, it just created cross-eyed characters, because words don't say precisely enough where things are.

The fix came from the text encoder itself. Krea 2 uses Qwen3-VL, a vision-language model, as its CLIP. I downsample the image and run one vision encode of the full image. That produces a grid of vision tokens with one per patch, each carrying what that patch holds and where it sits. For each tile, I slice out just the tokens covering that tile's area and use that in place of the positive prompt. No positive prompts are used because they only perturb the image, so I dropped the positive prompt entirely. The negative still works normally.

Each tile gets told exactly what it actually contains, and since every tile slices the same whole-image encode, they all agree on tone, palette, and structures that cross seams. No duplicated objects, no drift between tiles. Nothing is trained or added on since the model already reads these tokens natively through its own encoder. The effect resembles ControlNet, because it's spatially grounded guidance per tile, however it's delivered through the model's native conditioning rather than a trained adapter pushing residuals into the model.

So far I've done 4x upscales past 4K across 6 tiles at 0.42–0.5 denoise, which is the part I haven't seen any other tiled upscaler that produces results that are this detailed and coherent. I think it can be pushed further if we take the 4x result, run each region through another 4x pass, and composite it into a truly massive image.

Samples attached: 1024x576 to 4096x2304 in one pass.

Nodes are free here as well as the full-size samples: https://github.com/Blakeem/ComfyUI-ContextAnchoredTileRefine/

The VL nodes have been tested with Krea 2, but any model with a VLM text encoder should be adaptable.

u/blakeem — 14 days ago
▲ 8 r/comfyui_elite+1 crossposts

Context Anchored Tile Refine - Fast and seamless high quality upscaling node - faster and higher quality than Ultimate SD Upscale

My new ComfyUI node has just been made available.

I previously had a fork of ComfyUI_UltimateSDUpscale (ComfyUI_UltimateSDUpscaleGuilder), since I wanted to add a guilder input. Over time I kept adding new features to improve quality and fixed various bugs (that are still in the node today). I ran into issues with how it does tiling and lots of legacy code and features that were no good, like seam fix and fixed tile sizes. Recently they added a guilder node with the same name that conflicted with my node, so I decided to abandon that forked project.

So I created my own refine node from scratch, that I use to upscale and refine images. This uses all the methods I learned, along with a faster and more deterministic tiling method. The best settings are baked in, so there is no guessing. Instead of saying what tile size you want, you just give is the max dimensions you can generate and it calculates the tiles for you. You upscale the image before feeding it in. You can mask off areas and refine different parts using different models or settings. Everything in a single node.

I created a Tile Simulator to show you how the tiles are calculated for your images so you can optimize them. It shows how the context_overlap blends into the next tile (using a clever method I devised) as well as the context_anchor that keeps your tiles coherent by locking part of the adjacent tile's context across steps.

Expect example workflows to get added to the repo soon.

I use it with Chroma to generate the image (lots of variety) and then use Z-Image Turbo for the 3x upscale (fast and more realistic). I split out the character and the background (using SAM3.1 Image Segmentation), and process them with different settings so that I get more details in the background, and more coherent characters.

You can find it now in the ComfyUI Node Manager.

https://registry.comfy.org/publishers/blake/nodes/contextanchoredtilerefine

https://github.com/Blakeem/ComfyUI-ContextAnchoredTileRefine

reddit.com
u/blakeem — 27 days ago
▲ 2 r/comfyui_elite+1 crossposts

Context Anchored Tile Refine - Fast and seamless high quality upscaling node - faster and higher quality than Ultimate SD Upscale

[deleted]

u/[deleted] — 27 days ago
▲ 4 r/comfyui_elite+1 crossposts

Context Anchored Tile Refine - Fast and seamless high quality upscaling node - faster and higher quality than Ultimate SD Upscale

[deleted]

u/[deleted] — 27 days ago